
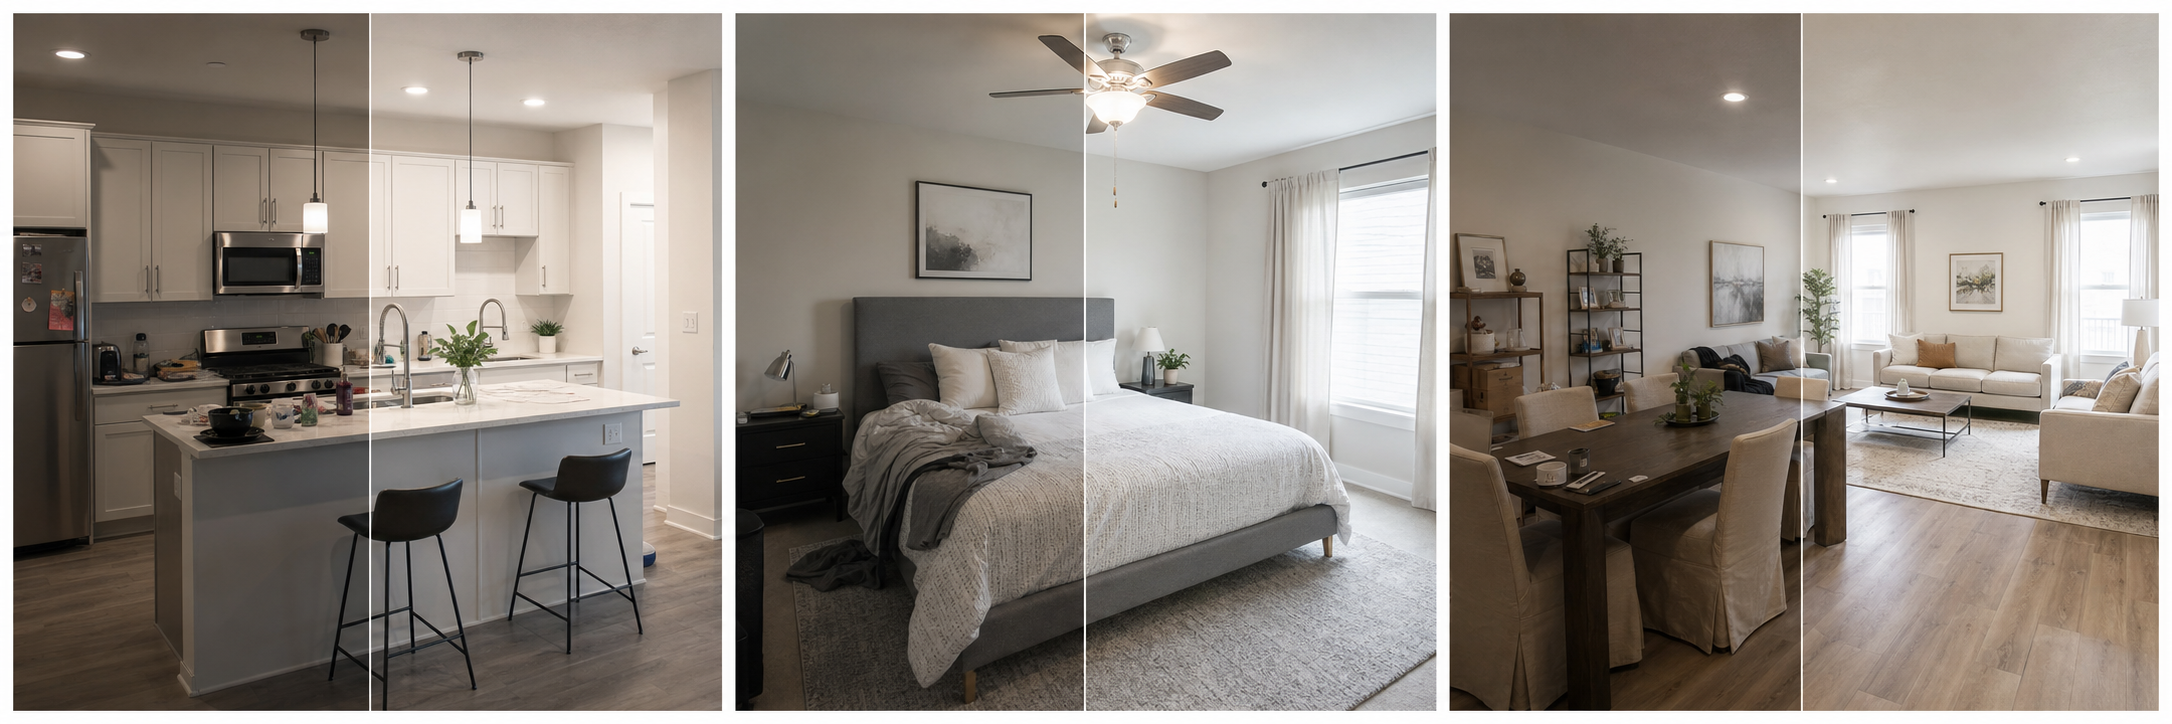
What makes listing photos actually good?
Good listing photos make a place easy to understand and easy to trust. Within a minute of scrolling, a guest or renter should know what the space looks like, how the rooms connect, where they will sleep, what amenities are included, and whether the property appears cared for. That standard is different from artistic photography: a beautiful but ambiguous photo loses to a plain one that answers a question. It also means completeness beats polish; one clear photo of every room outperforms ten stunning frames of the living room and nothing of the bathroom. The reliable formula is unglamorous: prepare the space thoroughly, use natural light, keep the camera level, shoot landscape, cover every decision-relevant room, and finish with honest corrections. Everything in this guide is an expansion of those six habits.
How should you prepare the space before shooting?
Preparation usually matters more than the camera. Clean every surface, remove clutter and personal items, straighten bedding, open blinds for daylight, hide cords, close toilet lids, and stage the space the way a guest or renter will actually receive it, because staging it any other way creates an accuracy gap at move-in or check-in. Airbnb's guidance explicitly recommends clean, clutter-free spaces shot in daylight, and the same logic applies on every platform. Walk each room slowly before shooting and look at it as a stranger would: the cereal box on the counter, the towel on the door, and the overflowing shelf are invisible to you and obvious in a photo. Ten extra minutes of preparation routinely saves an hour of editing and produces photos no edit could match.
For a deeper pass on this step, see staging your rental before photos.
Which shots belong in every listing?
Cover every space that affects the decision: if a room would change someone's mind, it deserves a clear photo. The core set below works for rentals, hotel rooms, condos, and apartments alike; add amenity shots for anything you advertise.
| Area | What to capture |
|---|---|
| Exterior or entry | Building context and the path a guest actually walks in |
| Living area | Seating, layout, and natural light from a corner angle |
| Kitchen | Appliances, counters, and cooking capability |
| Bedrooms | Each bed as it exists, with size and bedding visible |
| Bathrooms | Shower or tub, vanity, and cleanliness |
| Workspace and storage | Desk setup, closets, and luggage space |
| Extras | Parking, laundry, outdoor space, views, amenities |
How do you actually shoot each room?
Use the same simple routine in every room and the gallery will come out consistent, which itself reads as professional. The routine takes a few minutes per room once practiced.
- Open blinds and turn on lamps to fill dark corners; shoot at the brightest time of day.
- Stand in a corner or doorway that shows two walls and the room's purpose.
- Hold the camera level at roughly chest height so vertical lines stay straight.
- Shoot landscape; Airbnb and Vrbo both expect landscape orientation.
- Take the wide layout shot first, then closer shots of features worth proving.
- Avoid extreme wide angles that stretch the floor and mislead about size.
- Take several frames of each shot and keep only the sharpest.
What size and format do listing platforms want?
Shoot large and landscape and you will satisfy everyone. Airbnb recommends at least 1024x683 pixels and says bigger is better, with search results displayed in landscape. Vrbo sets the same 1024x683 minimum but recommends 3840x2160 or higher, accepts JPEG, PNG, or GIF up to 20 MB, requires at least six published photos, and rejects watermarks, text overlays, QR codes, and black-and-white images. Booking.com asks partners for at least 2048x1080, preferably around 4000x3000, and suggests at least ten photos. Zillow Rental Manager accepts JPG, GIF, PNG, or TIF under 10 MB and notes kitchen or living-room shots often work well as the primary rental photo. A modern phone's default resolution clears every one of these bars, so the practical rule is: never downscale before uploading, and never add text or watermarks to the image.
How should you edit photos after shooting?
Edit for clarity and stop at reality. Correct brightness so rooms read as they feel in person, fix white balance so whites are white, crop and straighten so lines are level, and sharpen lightly. Removing a small distraction like a stray cord is reasonable; removing damage, changing views, or reshaping rooms is misrepresentation that surfaces at check-in and in reviews. If editing is the bottleneck, Property Photo AI handles this routine lane automatically: uploads are free, one credit produces one finished photo, and touch-up mode corrects lighting, color, crop, and sharpness while preserving the real layout, fixtures, and views. It also offers a new-angle mode that generates additional plausible views from your real reference photos when you need more coverage. Whatever tool you use, the finished photo should help a viewer inspect the real place, not sell a fantasy.
To go deeper on light itself, read the best lighting for rental property photos, and check your final set against the photo checklist before publishing.
FAQ
What is the simplest way to take better listing photos?
Clean the space, shoot in daylight with blinds open, hold the camera level at chest height, use landscape orientation, and photograph every room a guest or renter needs to evaluate. Preparation and light matter more than the camera you own.
Should photos be edited after shooting?
Yes. Routine corrections such as brightness, white balance, cropping, straightening, and sharpening help viewers see the real space clearly. Edits should never change the layout, view, fixtures, or condition, because the photo's job is to match what people find in person.
Do I need a professional camera for listing photos?
No. A recent phone shot in good daylight produces listing-quality images for most properties. Stability, a level frame, clean staging, and correct exposure matter far more than sensor size. Reshoot in better light before assuming the camera is the problem.
What photo size do listing platforms want?
Airbnb recommends landscape photos of at least 1024x683 pixels and says bigger is better. Vrbo sets the same minimum but recommends 3840x2160 or higher. Booking.com asks for at least 2048x1080, preferably around 4000x3000. Shoot large and let platforms scale down.
How many photos should a listing have?
Enough to cover every room and decision-relevant feature at least once, without duplicates. Airbnb's photo-tour guidance expects at least one photo per space, Vrbo asks hosts to keep at least six photos published, and Booking.com suggests at least ten.
How Property Photo AI helps
Property Photo AI helps landlords, Airbnb hosts, property managers, and real estate teams turn existing room photos into cleaner listing-ready images. It is built for realistic touch-ups: better light, color, crop, sharpness, and small-distraction cleanup without changing the actual room layout, fixtures, view, or condition.
Sources
- Airbnb Help Center: Taking great photos of your listing
- Airbnb Help Center: Setting up a photo tour for your home listing
- Airbnb Help Center: Add visual descriptions to photos in your listing
- Airbnb Help Center: Confirming photo accuracy for listings
- Airbnb Help Center: Offer for free Airbnb photography
- Google Business Profile
- Google Business Profile Help: Manage your hotel's details
- Booking.com Partner Hub: Understanding photo requirements for your property
- Booking.com Partner Hub: Improve visibility and ranking
- Vrbo Help: Photo guidelines
- Zillow Rental Manager Help: Photo Uploading Tips
- Zillow Rental Manager: Post a listing
- Zillow Rental Manager Help: Why is my primary photo different?
- Craigslist Help: Creating a posting
- Craigslist Help: Images
- Airbnb Help Center: Pricing your home listing
- Airbnb Help Center: Compare similar listings
- Airbnb Help Center: How search results work