
What should an Airbnb photo checklist actually cover?
A useful photo checklist covers four phases, not just the shoot: preparation, shooting, editing, and review. Most weak galleries fail in the phases hosts skip. A beautiful photo of a cluttered room fails at preparation; a tidy room shot vertically in dim light fails at shooting; good raw photos published straight off the phone fail at editing; and a strong set uploaded in random order fails at review. Before publishing, your photo set should pass one summary test: a guest scanning it cold should be able to understand the stay, trust the space, and see the main reasons to book within about thirty seconds. The checklist below walks each phase in order, and the whole cycle is repeatable whenever the space changes or bookings slow down.
How do you prepare each room before shooting?
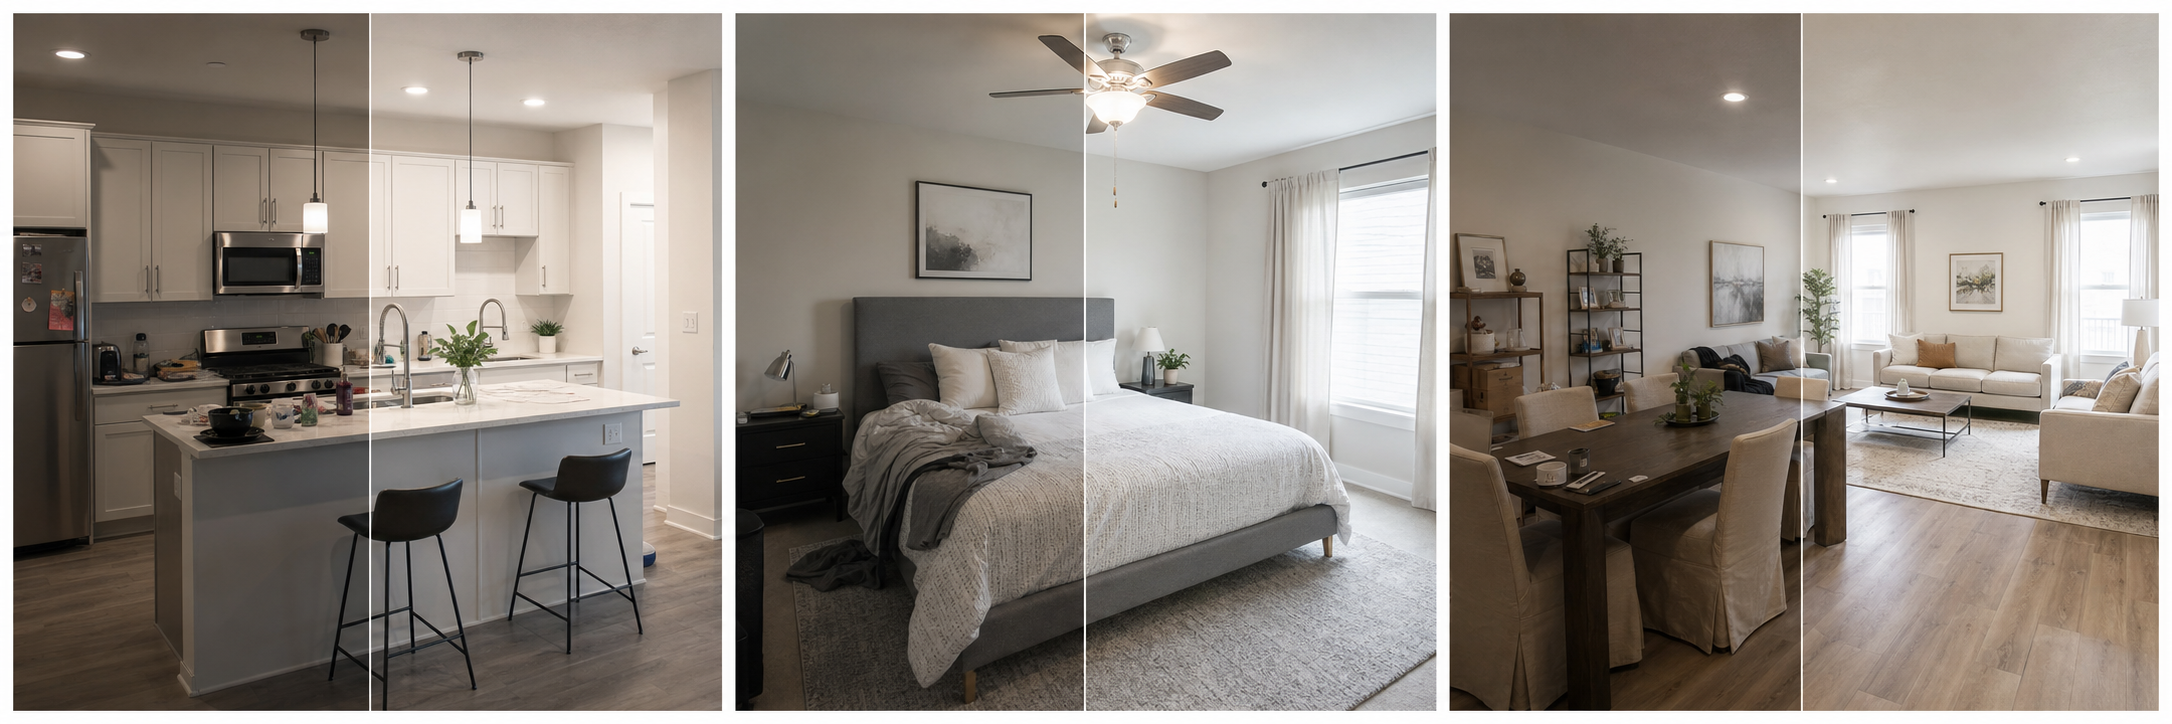
Preparation is staging the space the way a guest will receive it, then removing everything that competes for attention. Airbnb recommends a clean, clutter-free space and daylight where possible, and that advice is worth taking literally: open every blind, turn on every lamp, and clear every surface down to one or two intentional objects. Personal items, cords, chargers, and cleaning supplies read as clutter at photo scale even when the room feels tidy in person.
| Room | Prep essentials | Must-have shot |
|---|---|---|
| Living area | Straighten cushions, hide remotes and cords, open blinds | Wide shot from the doorway |
| Bedroom | Iron or smooth bedding, clear nightstands | Bed with window light |
| Kitchen | Clear counters, hide sponges and bins | Wide shot showing appliances |
| Bathroom | Close toilet lid, fresh towels, clear counter | Full room, mirror-checked for reflections |
| Exterior or entry | Sweep, remove bins and cars where possible | Approach view a guest would see |
What should you check during the shoot itself?
During the shoot, three habits cover most of what matters: orientation, level, and coverage. Shoot landscape, because Airbnb recommends landscape images of at least 1024x683 pixels and displays search-result photos in landscape. Keep the camera level at roughly chest height, and avoid the extreme wide-angle look that stretches rooms and erodes trust. For coverage, take at least one clear photo of every major room so each space can appear in the photo tour, then capture the amenities guests filter for or ask about: parking, workspace, laundry, kitchen appliances, outdoor space, crib, accessibility features, and views. Shoot each room from two or three positions so you have options later, and reshoot immediately anything that looks dark or soft on the phone screen; fixing it now is faster than fixing it in editing.
What edits belong in the post-shoot pass?
The editing pass has one goal: make every photo clear, consistent, and honest. Correct brightness so rooms read light and welcoming, fix white balance so whites are white across the whole set, straighten verticals, sharpen softly, and crop out dead space and door frames. Remove small temporary distractions, a cable, a bin, a car in the driveway, where appropriate, but never edit away damage, wear, or permanent drawbacks a guest will encounter. This is the stage where a dedicated tool earns its keep: Property Photo AI applies exactly this kind of realistic touch-up, fixing lighting, color, crop, and sharpness while preserving the real layout, fixtures, and views, with free uploads and one credit per finished photo. However you edit, process the whole set together so the gallery feels like one property photographed on one good day.
How do you review the gallery before publishing?
Review on a phone, because that is where most guests will see the listing, and review at scrolling speed rather than lingering on each image. You are checking order, coverage, and honesty in one pass. Anything blurry, dark, duplicated, misleading, or confusing should be fixed or cut; a smaller sharp gallery beats a padded one.
- Set the cover photo and check it at thumbnail size in landscape.
- Arrange the first five photos: living area, bedroom, kitchen or bathroom, differentiator.
- Order the rest as a walkthrough, wide shots before details.
- Confirm every room and bookable amenity appears at least once.
- Delete duplicates, near-identical angles, and anything blurry or dark.
- Apply the fairness test: would each photo feel accurate to a guest standing there?
- Add objective visual descriptions to every photo.
- Scroll the finished gallery once more at guest speed before publishing.
What final details improve the listing after the photos are set?
Two finishing details are easy to skip and worth doing. First, visual descriptions: Airbnb notes they help guests using screen readers, guests on slow connections, and give search engines context about each image. Keep them objective, describe what the photo shows, not how amazing it is, and write them while the shoot is fresh. Second, put a review date on your calendar. Galleries drift out of date as furniture changes, seasons turn, and amenities are added, and an outdated gallery slowly becomes an inaccurate one. A light refresh every season or two keeps the promise current.
To go deeper on individual steps, see ordering the photo tour, choosing a cover photo, and photographing amenities.
FAQ
What should every Airbnb listing photo set include?
Include clear photos of the main living area, every bedroom, every bathroom, the kitchen, the exterior or entry, and any amenity guests filter for. Airbnb's photo-tour guidance expects each room or space to have at least one photo.
What is the best photo format for Airbnb listings?
Airbnb recommends landscape photos of at least 1024x683 pixels, and bigger is better. Search-result photos display in landscape, so horizontal images make the cover and the first five photos far more effective than vertical shots.
Should hosts stage the space before shooting?
Yes. Airbnb recommends a clean, clutter-free space and daylight. Staging for photos means presenting the space the way a guest will receive it: beds made, surfaces clear, lights on, blinds open, toilet lids closed, and personal items out of frame.
Do photo descriptions actually matter?
They do. Airbnb notes that visual descriptions help guests using screen readers, guests on slow connections, and give search engines context about images. Keep descriptions objective, describing what the photo actually shows rather than adding marketing language.
How Property Photo AI helps
Property Photo AI helps landlords, Airbnb hosts, property managers, and real estate teams turn existing room photos into cleaner listing-ready images. It is built for realistic touch-ups: better light, color, crop, sharpness, and small-distraction cleanup without changing the actual room layout, fixtures, view, or condition.
Sources
- Airbnb Help Center: Taking great photos of your listing
- Airbnb Help Center: Setting up a photo tour for your home listing
- Airbnb Help Center: Add visual descriptions to photos in your listing
- Airbnb Help Center: Confirming photo accuracy for listings
- Airbnb Help Center: Offer for free Airbnb photography
- Google Business Profile
- Google Business Profile Help: Manage your hotel's details
- Booking.com Partner Hub: Understanding photo requirements for your property
- Booking.com Partner Hub: Improve visibility and ranking
- Vrbo Help: Photo guidelines
- Zillow Rental Manager Help: Photo Uploading Tips
- Zillow Rental Manager: Post a listing
- Zillow Rental Manager Help: Why is my primary photo different?
- Craigslist Help: Creating a posting
- Craigslist Help: Images
- Airbnb Help Center: Pricing your home listing
- Airbnb Help Center: Compare similar listings
- Airbnb Help Center: How search results work